Page 15 of 15

Re: New Content??

PostPosted: Fri Aug 17, 2012 4:10 am
by Tweek
Tsar Hoikas wrote:As I have already stated, lighting is a huge issue--I immediately thumb past anything that appears shadeless. You can bake primitive lights by simply placing a 3ds Max (not Plasma) light into the scene. For more advanced lighting techniques (including baked shadows), we have a decent tutorial on light mapping available.


For an example of what I believe Adam is talking about.

Early shot of Fehnir's house;

Image

Unfortunately a lot of Ages keep the flat lighting and (often use flat textures or "bryce textures" as I call them) and it makes them look off.

Then (later in the process) we have something like this;

Image

Where shadowing, and depth has been added which makes the location look a lot better. Course even in this picture I can see much that could be improved but that's besides the point.

An example of what I call Bryce Textures:

Image

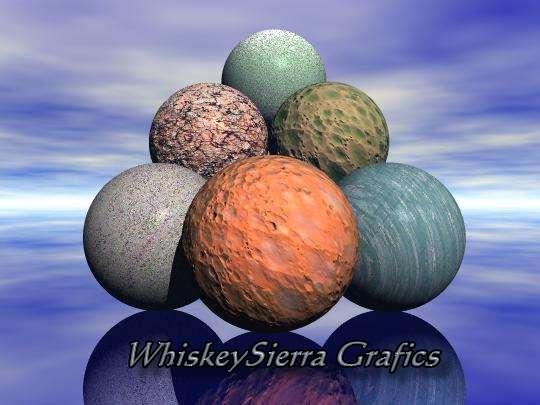
If you're using textures, I highly suggest taking from photo textures or stock photography. If you're making textures in GIMP or Photoshop build from a photo texture base. It gives textures a more realistic feel and not that washed out "plastic" feel from "bryce textures"

Re: New Content??

PostPosted: Fri Aug 17, 2012 8:51 am
by janaba
There are quite a lot ages up-to-par of which I've posted already a few in this thread along with pictures and
everything, and I just posted something in the Off-Topic section many of you here might be interested in ... :D

Re: New Content??

PostPosted: Fri Aug 17, 2012 9:14 am
by Karkadann
Relativity although it has shadows, its still needs a sky, some gardens, its missing the tables and chairs and planters from the drawing, and its been converted to a blender file so unless somebody wants to convert it back to Max its up to the blender artist here to get that one "up to par"


here is the thread if any ones interested
Escher's Relativity is doable
Blender and python files are on Page 5

Re: New Content??

PostPosted: Fri Aug 17, 2012 4:32 pm
by Chuckles58
I agree that Relativity is one of the best and most unique ages around. It would be great if the gardens could be added, but I'm not sure what kind of sky would be best, considering it is an impossible age anyway.

About the Walking Maze age, I'm afraid that shadows might conflict with the proper use of the sound puzzle, as it was Cyan's original concept that became the mine runner on the Selenetic Age in Myst. If the light source were placed directly above the age, then shadows would be directly underneath the avatar. Just thinking from the peanut gallery.

Keep up the good work, Karkadann. Hopefully you'll get some help in getting your excellent work up to par, as they deserve what is necessary to become showcase ages (IMHO).

Re: New Content??

PostPosted: Sat Aug 18, 2012 11:29 am
by Karkadann
Thanks Chuck
I think im gonna put my age submission for the Gehn shard on hold for now, wait for a few more fan made ages to find their way on Gehn so I can get a better idea of what kind of ages you guys consider "up to par"

Re: New Content??

PostPosted: Sat Aug 18, 2012 12:07 pm
by Tsar Hoikas
If you're already aware of this tip, forgive me, but it's a pretty important one. It's a very quick and CHEAP (as in, it will cause no lag) way to make your ages look better.

For those of you using PyPRP1 and Blender 2.49b, static vertex lighting can be baked easily. As mentioned above, you should add lamps to your scene to cast color on your objects (you will see the results in shaded mode) and set them to not export (this is usually done by setting the page id to an unspecified page). Then, enter vertex painting mode and toggle "Paint -> Set Shaded Vertex Colors" (there appears to be no hotkey). This will bake static vertex lighting into the currently active vpaint layer.

Vertex lighting, as the name implies, only affects single vertices. The lighting effect achieved will improve in quality with more vertices in the object. If your object is very low-poly and you require extremely accurate static lighting (this is common in building interiors), then you may wish to use a lightmap OR subdivide your mesh, depending on the situation. The introduction of this article is a good introduction to the subject.

While I'm on the subject of lighting, here is a tip for you lightmap users: NEVER compress your lightmaps into DDS files in your Textures prp. When it comes to pipeline hint textures, like lightmaps and bump maps, decreasing the resolution by half is always preferable to compressing the texture. Why? Compressing into DDS is a lossy process, meaning, you are losing detail. Lightmaps and Bumpmaps with perfectly preserved detail always look better! Besides, you are probably making your lightmap too big anyway.

Re: New Content??

PostPosted: Sat Aug 18, 2012 12:24 pm
by Branan
Or just don't worry about lightmap size and do what looks good, since almost everyone has 4, 8, or even 32 ( :shock: ) times the graphics memory that Uru was designed to use.