
Disclaimer: this is going to be a long entry. So long in fact I had to cut it into several parts, today is only the first part. Now that you know this, read at your own risks. (Not all of my entries in this journal will be this long.)
In an odd coincidence of fate I noticed that I posted my first entry to this journal exactly six years day to day after I started my first Myst site. Which was about.. you guessed it: Custom Age creation. Well at the time, it wasn't exactly that, but it was as close as you could get. History repeats itself I guess. That, or my brain just runs in circles and is at its top during the night between august 5 and 6 of each year... Which is odd because that precise day is the birthday of someone very dear to me. Maybe there's a link here. I should just see an analyst.
Anyway, back on topic. Ahra Pahts' genesis. At least my side of it.
Yesterday I told you things about pizzas, Excel, swedish pop music bands.. Let's see how all that fits into the grander scheme of the Age. For that let's take a quick trip down my memory lane; the last six months to be precise.
So far making this Age has been no small task, it's been a big project, and in all big projects at some point you have to do a break, look back and do a quick summary of what went on so far. For me this started several weeks ago. I thought it'd be both interesting and useful to do a summary of my work and to get out of it some useful Blender tips to share. I started writing a document. It started getting long. It started getting very long. And confusing. (Much like this entry, hu?) Long story short, I dropped it and focused on my actual work. Now with this journal I hope to bring back some of the spirit and usefulness of this document. Of course because I'm lazy, most of the entry today (and probably some of the upcoming entries) will be taken straight out of this document.
* * *
As all projects this city started with sketches and passionate discussions. Long story short, the initial city layout that resulted from these debates (long disappeared in the depths of the internet unfortunately) was this one:
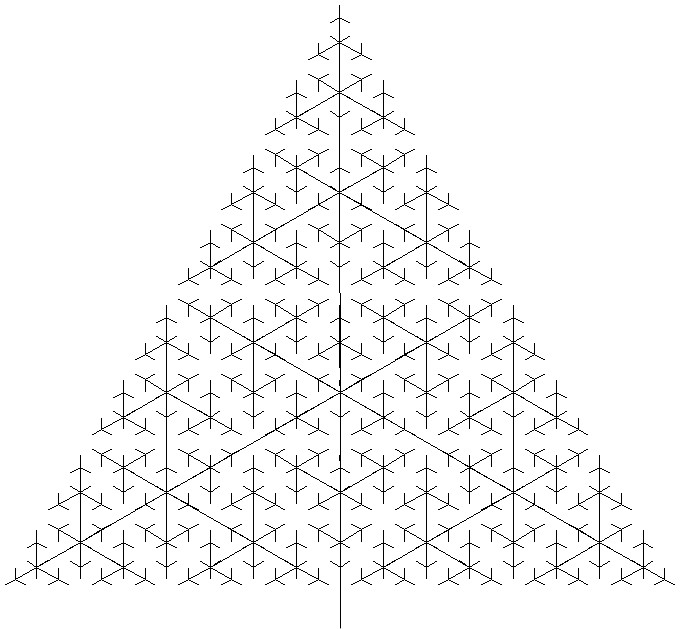
The only big change we did to this plan was that we reduced it and turned it upside down. But that doesn't change anything to what I'll describe bellow.
This image was done by Dustin (who happens to have also since long disappeared in the depths of the internet), it is a fractal; a mathematical pattern that repeats itself ad infinitum. Perfectly suited for an ever-expanding city, right? No!! Well, yes it is, except that it's a triangle!! As any architect will tell you: working with right angles and square shapes is easy. This is not a square shape; and it has no right angles. And it still need to be very precisely built. This is a good 'worst case scenario' for a 3d artist. And yet somehow at the time I agreed it would make for a great city -- we all make mistakes. (in fact at some point I thought about reverting it back to a square shape; but it didn't happen -- It could make for an interesting entry some day though).
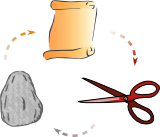
Anyway, there I was going with this triangular-shaped city and I had to find a way to actually build it... But to do that, I had to find what were the shells going to be like. And here comes our special guest of the day: the Pizza. The plan we had only showed the layout for streets, but not the actuall shape of the shells. So I had to cut the empty space between those streets and turn that into shells. Sculptors will tell you: "you don't create a statue; it is already there, hidden in the stone waiting for you to reveal it, by removing the unnecessary stone". It's how I felt right at this moment trying to find what those shells could be like. And then I looked at my pizza. (We all have a pizza on our desk right?) The way those streets were, the shells had to be arranged in circles and cut in equal parts. Like my pizza. Problem solved, yay for pizzas. (In fact they are more like hexagons rather than circles. But let's keep the pizza analogy anyway.)


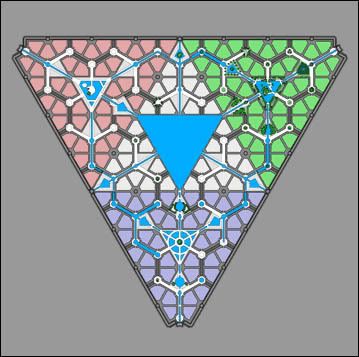
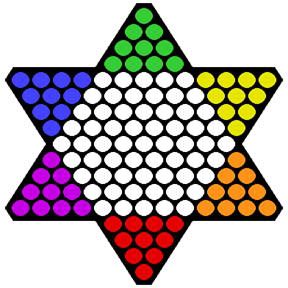
We did some adjustments like adding in the Rivers and a canal, making room for courtyards, but mostly we had the definitive plan of the city (which is the one I did above). And now that we knew what these empty shells looked like I had to actually build all 150 of them. Since they are all identical, the goal was of course to be able to create only one and duplicate it throughout the entire city. But the structure was complex (those triangles..) and the question became: how to do this efficiently since the shells aren’t arranged in an easy grid-like pattern? Well, in fact they are indeed arranged in a pattern, just a slightly more complex one than a simple square grid. If we look at the original plan we can see that it can be decomposed into a grid of triangles overlaid to a grid of hexagons (the pizzas); where each 1/6 of an hexagon is a shell and each triangle’s vertices is the center of an hexagon.

The goal then became to have shells in group of six (the hexagons) and duplicate them along that triangle grid. Now it just so happens that Blender has this very useful tool called ‘Dupliverts’. It allows us to duplicate an object on all the vertexes of another object; which is exactly what we needed to do. We only had to create a grid of triangles, make it a ‘dupliverts’ object, assign the shells to it and 'voila'. We now had everything needed to efficiently duplicate one single shell into an entire city of 150 shells. (This could probably have be done without the Dupliverts tool, duplicating the shells one by one and moving them by hand; but since there was this tool, why waste huge amounts of time?)

Off course this is the 'short version' of how this was done. I'll spare you the several variations and adjustments I did to this method before ending up with what we have now. From the top of my head I think I restarted the city from scratch 4 or 5 times, for many reasons, among which:
- I was testing various methods
- I discovered a bug with the plugin that made impratical to use mirrored objects because they end up inverted in Uru (their normals are somehow inverted, although they are fine in Blender)
- I discover late in the process that the dupliverts mesh I used wasn't precise enough geometrically and was causing the shells to be unproperly aligned; which caused holes and gaps between the streets and the shells. Small enough to go unnoticed at first, but very noticeable once in Uru.
- etc...
But in the end the method proved to be good and could be used for the whole Age. And that was the point of all this.
Now some of you may remember ABBA that I mentionned earlier? Well.. I don't like to listen to music when I work, it just disturbs me; I sing and dance on my chair and I don't work. So when I do listen to music I listen to stuff I can't sing or dance: instrumental music, classical music, operas, movies/games soundtracks. But a while ago I somehow discovered ABBA again. Now some people just give me weirds look when I say I listen to ABBA, but I'm not easily offended and I just love their music. And for some unknown reason, their music doesn't disturb me, rather it helps me stays focused and be productive. I don't understand why, maybe something about their tempo. Maybe indeed I should just see an analyst.
The fact is I built most of the Age while singing 'Dancing Queen'.
Bummer.
* * *
In the next entry, I'll write about some finer details of this duplication process. Because not only did it have to work for the shells, but also for the streets, the lamposts, and all of the objects in the scene that had to be duplicated. I'll also touch briefly about some other details of the Age exporting in Uru, and some numbers taken from my compulsive habit of statistics.
