Okay Karkadann,
Please realize that almost everything you see in Uru/MOUL are object meshes that have external textures applied on them. The game engine, Plasma needs to know: Where, Scale, Offsets. Meaning: What texture for this object do I use? Where on the object to I put it? Should it be zoomed in or not? Does this texture move?
All sorts of information.
Plasma does not use all the neat things that 3DS Max uses to render a picture or movie, because Uru's game engine, Plasma, must render those objects in REAL TIME.
This means using textures that are already made. Plasma simply puts them where we tell it.
What texture to use we tell Plasma with the Material Editor by giving the object materials, and the "layer" is the actual texture.
Where to put the texture we use UV Coordinates. Plasma needs to know where each face of the object must be on the flat texture.
So let's use your dice as an example. I made a crude texture for your 12 sided die:
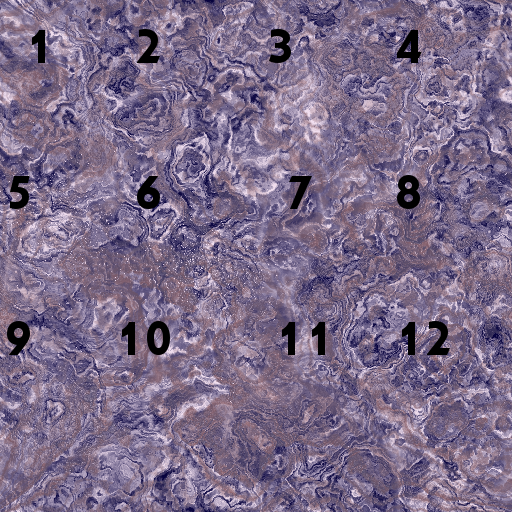
I made a 512 x 512 texture here. I put all 12 numbers right on the texture. You could get really fancy and have 12 different textures, each with it's own number, but why? Performace while looking good is what we are after. Plasma will have to work REALLY hard to do Real Time Rendering on an object that has 12 textures applied to it, but it will be able to quickly Real Time Render an object with only one texture.
This is important as making Plasma work too hard can result in: lag. VERY bad lag, graphic glitches (things flickering in and out of existance), and the game crashing.
Now, once you have your object made, and you've applied your material and single texture here, you need to UV Map it. Here is how:
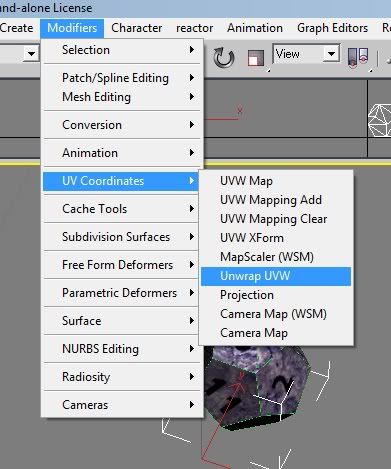
Go up to your menu and click on Modifiers>UV Coordinates> Unwrap UVW:
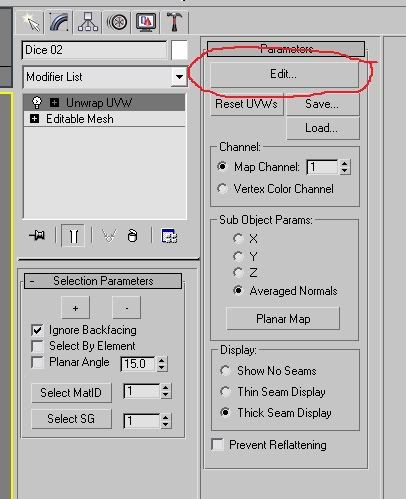
Now go over to your Modifiers Tab. You'll have your UV Modifier there. Click on the Edit button:
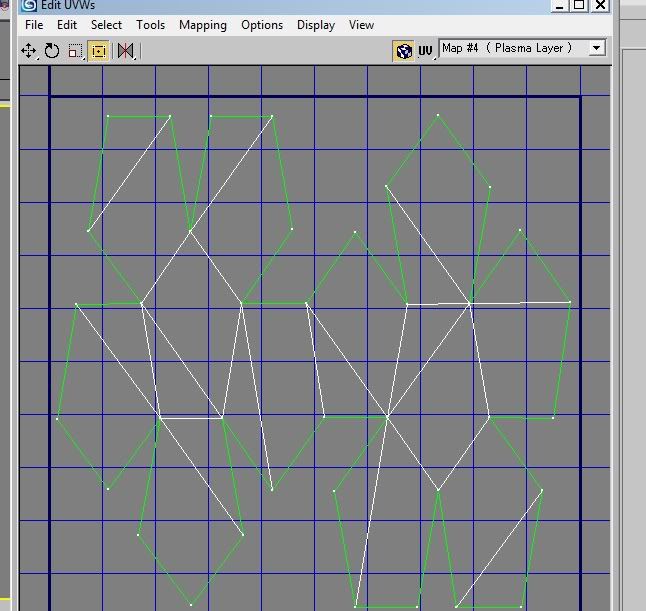
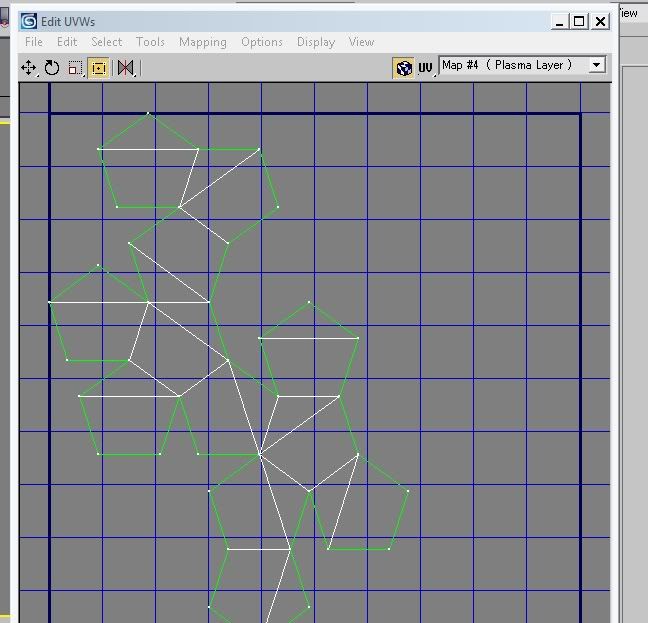
When you do, you'll have a new window pop up, showing you the faces of the object. Most of the time, it will be unwrapped in a funky way that doesn't look right. Nor will it show your texture. Something like this:
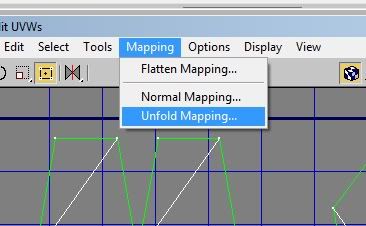
Go up in the menu of your UV window there, and click on Mapping. You will have 3 selections you can pick. The one that unwrapped each face for me was Unfold Mapping:
NOw it laid the faces of the die like this:
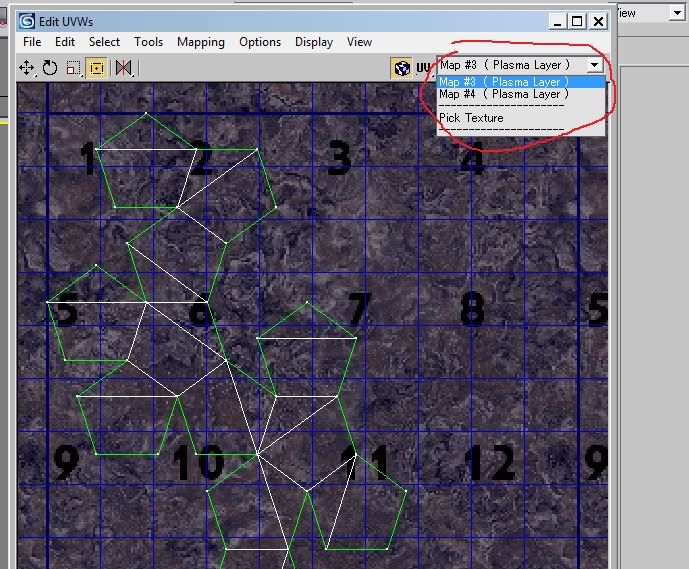
As you can see, each face of the die is now laid out flat. Now let's call up the texture we gave it. Click where the drop down box is and select the Plasma layer that is the texture you gave your die:
Now for the tricky part. In the window, you can select each vertex of each pentagon face (one face at a time). Then go up and select Tools>Detach Edge Verts.
This will let you move one face around that you have selected, without bothering the other faces. Move each face of the die this way, and get them to where you want them on the numbers. You should end up with something like this:
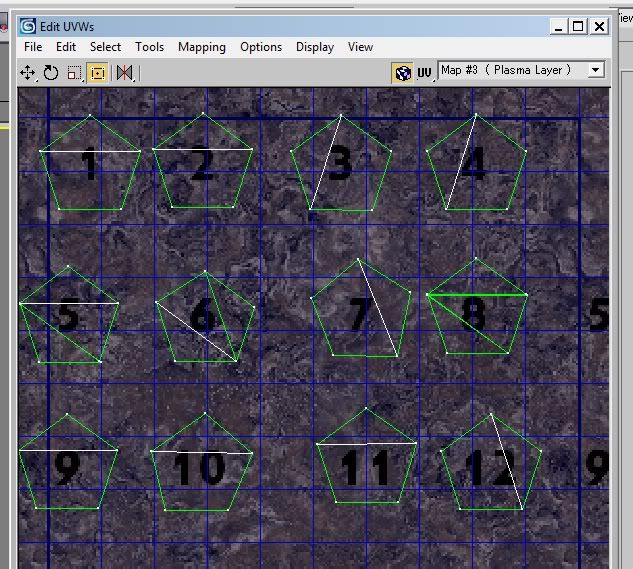
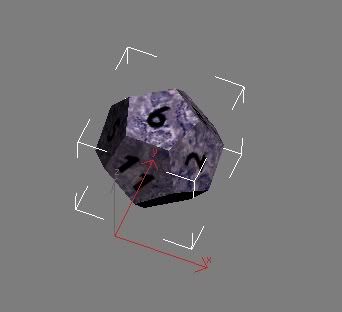
As you can see, each face is now on a number. And now if you look in your 3D Scene window, the die.....well it looks like a 12 sided Die that you can buy in any gaming store:
Hope this help you understand UV Mapping and how to use it, and what it's for.


