
Wonderful site, Jennifer. That guy (yorik -- 'alas...') is a real artichoke. It has taken me over an hour to copy, configure and plant his article into my OOo word processor.
But you are so right! This will save me all of that struggling down time wasted on deadends. [Contrary to popular misconception, i have not learned that much from the newbie mistakes i have been making on the CtYd Facade:
For Instance [and i would appreciate an answer on this] How do you clear the right hand pane, the one used for UV/ editing? Obvious and simple, i am sure. But i get in the rut of 'how-to-do-it' and i am blinder than Miss Piggy when it comes to finding the way out. You wouldn't believe how i struggled to save the left pane work but get rid of the right one. [Please, just a simple, All you have to do is press that button there; no editorials on how stupid i am.]
Thanks again, Jennifer, for pointing me to Yorik's page. Would that tutorial not help everyone? I dunno. I am anxious to get into it.
Jennifer's Classroom
-
pappou
- Posts: 269
- Joined: Mon Oct 15, 2007 6:27 am
- MOULa KI#: 65259
- Location: U of Texas @ Arlington (ret)
Re: Jennifer's Classroom
pappou
Re: Jennifer's Classroom
pappou wrote:...You wouldn't believe how i struggled to save the left pane work but get rid of the right one...
Thanks again, Jennifer, for pointing me to Yorik's page. Would that tutorial not help everyone? I dunno. I am anxious to get into it.
Remember how you originally split one pane, to make the second one? Begin by doing as you did then:
- Hover the mouse over the border between the two panes.
The pointer should change to its "resizing" appearence.
- Right-click to bring up the pane menu and select "Join areas".
( this option will only be present if there is only one pane on either
side of the border. If one of the panes is further divided in the
opposite direction, those panes will have to be joined first. )
- Now both panes will be shaded and there will be a large arrow pointing
into one of them - move the pointer over to the other side of the border
and the arrow will flip over as well. It indicates which pane will take
over the territory occupied by the other -- just take your pick and one
last click should bring you home.
Ye olde jester's tutorial there seems very good and comprahensive! /me too has to make time to read and digest it -- thanks, teach!
Re: Jennifer's Classroom
welcome to the club of porcupines and piggies, ametist!  Don't worry, we're all at the same blinder - ER I mean blender level
Re: Jennifer's Classroom
Sophia wrote:
But I'm worrying a lot. I've got the feeling I'm still in the cellar while others are in the attic already.
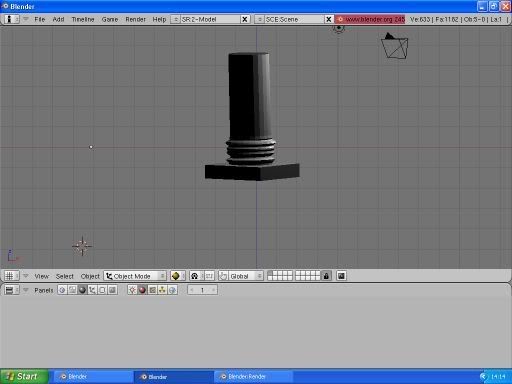
I made so many pillars and tried to make them look as perfect as Sophia's until I found out that it's not possible with the means we learned so far in Jennifer's classroom.
I don't know how many times I made a new pillar, but eventually I found out that it has to do with mapping and unwrapping and stuff. I even used unwrap and something else and the pillar looked much better but there is a lot more that I have to find out.
Here are the poor results I got with simply applying the texture (Lesson 9) and vertex painting (I had a better looking one but forgot to take a picture
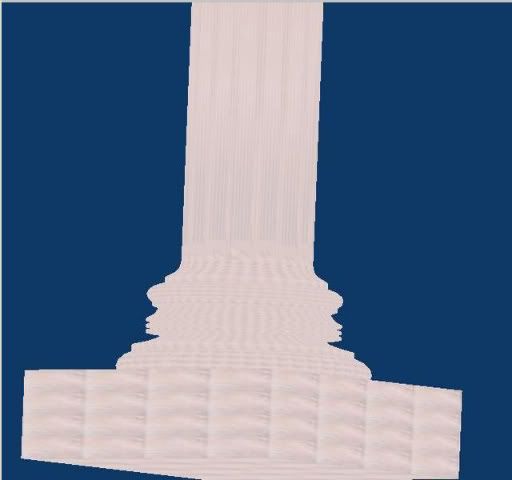
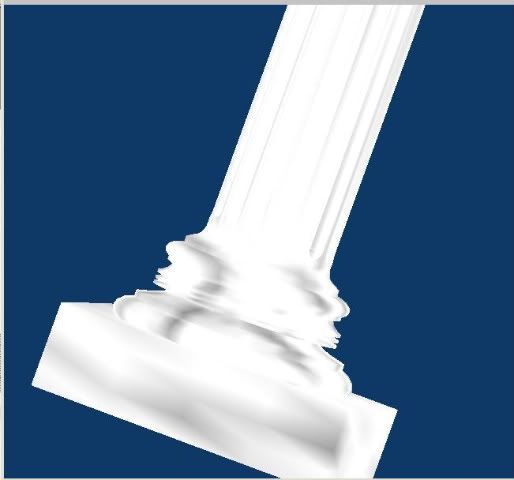
Maybe I'm too slow for this class.
"To regard the imagination as metaphysics is to think of it as part of life, and to think of it as part of life is to realize the extent of artifice. We live in the mind."
-Wallace Stevens-
-Wallace Stevens-
Re: Jennifer's Classroom
Corvus, I'll show you mine - I gave up when I couldn't get rid of that colour  have no clue where it came from!!!
So consider yourself atleast a couple of floors above me And because it's 'Mothers Day' today, me and 'Miss Piglet' spend the day at the Spa  LOLOL
LOLOL
EDIT: That's enough with Spa for a while( to much to eat that's for sure)! Just look at that fat little gal Well, actually I just have persuaded her to move so now for some exercise!!
But now I have a question - I've made a little animation - she is jumping over an obstacle, yes indeed . How do I save that file so I can open it in, say Quicktime?
So consider yourself atleast a couple of floors above me
EDIT: That's enough with Spa for a while( to much to eat that's for sure)! Just look at that fat little gal

But now I have a question - I've made a little animation - she is jumping over an obstacle, yes indeed
Re: Jennifer's Classroom
ametist wrote:...How do I save that file so I can open it in, say Quicktime?
Output format can be set in the Scene/Render buttons, "Format" panel. File name goes into the "Output" panel on the same pane.
Re: Jennifer's Classroom
Is it just me or do all the pictures show as black? 
Re: Jennifer's Classroom
Sophia wrote:Is it just me or do all the pictures show as black?
Well, I hate answering a post with "me Too" but, Me Too! In fact, every image linked later than those in this thread show up as black. Hmm... except for Andy's water texture.
Re: Jennifer's Classroom
(Not me too!)
What's that supposed to mean? We're not good enough for you?
Ok I was saying that the wrong way. I meant that making so that they aren't allowed to "cross" each other. Then the cylinder isn't allowed to scale down where the sphere is and you get the bump. Is that possible?
My hedgehog looks sad. Like if someone has played with his DNA a bit too long kind of sad. *runs off to make a leaf instead*
Edit: Okay tried making a picture with transparent thing now and it looks grey in the transparent parts when you render it. Is it supposed to do that? I have checked the "alpha" button in the preview and the "use alpha" in the Map Image area.
Jojon wrote: Ah, more turnip people -- soon we will *muahah* sweep through the ages with our *miyehheh* army of writers and... err.. nevermind..
What's that supposed to mean? We're not good enough for you?
Jennifer_P wrote:And if you have a cylinder with a sphere inside it, can you scale down the cylinder and make it get a "bump" on the middle where the sphere is? I know that's pretty easy to test on my own but then I'd get stuck.
You certainly could. But it would be just as easy to create the sphere the right size and just move it into the cylinder.
Ok I was saying that the wrong way. I meant that making so that they aren't allowed to "cross" each other. Then the cylinder isn't allowed to scale down where the sphere is and you get the bump. Is that possible?
My hedgehog looks sad. Like if someone has played with his DNA a bit too long kind of sad. *runs off to make a leaf instead*
Edit: Okay tried making a picture with transparent thing now and it looks grey in the transparent parts when you render it. Is it supposed to do that? I have checked the "alpha" button in the preview and the "use alpha" in the Map Image area.

Re: Jennifer's Classroom
Junee wrote:What's that supposed to mean? We're not good enough for you?
Oh, I just figured we weren't quite mad enough, but hey - let's go ahead then.
Junee wrote:Then the cylinder isn't allowed to scale down where the sphere is and you get the bump. Is that possible?
Unless you try the shrinkwrapping script, the simplest way is probably to do it the same way you did the pillar. If you have the tube already, select all length-wise edges and subdivide them a few times ("W" -> subdivide Multi), then loop-select the middle ring, where you want to make the belly and scale it with proportional mode switched on and a suitable falloff profile chosen. Personally, I would probably look at the pipe from the side though, and scale and move each ring section manually, according to a guide in the form of a circle added and deleted afterwards, just to make the task more fiddly
Junee wrote:My hedgehog looks sad. Like if someone has played with his DNA a bit too long kind of sad. *runs off to make a leaf instead*
Ah - our own doctor Mengele is building her army - this looks promising. *another Esher moment*
Junee wrote:Edit: Okay tried making a picture with transparent thing now and it looks grey in the transparent parts when you render it. Is it supposed to do that? I have checked the "alpha" button in the preview and the "use alpha" in the Map Image area.
Humma... Just to make sure: did you make sure to save it in a format that supports an added alpha channel, such as png or targa? If the checkerboard pattern shows through in the texture buttons preview (that "alpha" button has no effect anywhere other than on that preview picture, as far as I know, btw), you should be fine.