Lighting tutuorials

If you feel like you're up to the challenge of building your own Ages in Blender or 3ds Max, this is the place for you!

Re: Lighting tutuorials

Postby Justintime9 » Sat Jan 26, 2008 9:09 am

ah, thx guys... I'm actually trying to make transparent water... u know, so I can see my avatar's legs faintly underwater.
User avatar
Justintime9
 
Posts: 1188
Joined: Sat Sep 29, 2007 5:37 am

Re: Lighting tutuorials

Postby andylegate » Sat Jan 26, 2008 9:19 am

Right, you do the same thing for that Justin! Just make a plane as your mesh (with the Normal face, facing upwards)

Then you need to either find a transparent water texture, you make one.

Then you just need to apply it in blender, like you do all your other textures. Give it a material, go to Textures and set the texture as the water image that you found/made. Make sure that you then click on UseAlpha while in Textures (it's under the Map Image box), and then UV map the image to the plane so it looks right. You do all that, and you'll get a transparent water texture for that plane.

Just make sure that the image you use is a png image.
"I'm still trying to find the plKey for Crud!"
Image
Blender Age Creation Tutorials
3DS Max Age Creation Tutorials
User avatar
andylegate
 
Posts: 2348
Joined: Mon Oct 01, 2007 7:47 am

Re: Lighting tutuorials

Postby Justintime9 » Sat Jan 26, 2008 12:12 pm

what do you mean Transparent texture? a texture with low obacity?
User avatar
Justintime9
 
Posts: 1188
Joined: Sat Sep 29, 2007 5:37 am

Re: Lighting tutuorials

Postby andylegate » Sat Jan 26, 2008 12:31 pm

No, uhm, heheh. hang on let me explain.....

There are different kinds of pics that you can have with different background. One type of file(s) will let you have a transparent background. A tranceparent background is just that: Transparent, like glass.

You would use this if you need to over lay a picture on top of another one, but you need part or parts of the bottom picture to show through. For example, let's say you find the perfect book cover texture. And let's say you want it to look like it has, coffee stains on it.

One way you can do that, is create the coffee stains in a seperate picture. You then add a Tranceparent background (most times called an Alpha Channel).
What you'll see in your paint program is the coffee stains, with a grey checkered back ground.
When you copy this pic into the leather cover book pick, you'll see your coffee stains, AND the book cover.

That's a tranceparancy.

Now, only certain file types support this. JPG is NOT one of them. Gif is, but Blender doesn't know about them. It wants to use png's

An example of using a tranceparancy in and Age, would be like my chain link fence........

You want to be able to see through the holes in the diamond pattern of the chainlink, just like in real life. So you either find or make a transparent Chain Link texture, and use it. This way, you see the chain link part, but see through the holes!

I'll edit this in a minute to show you some pics.

'kay, here we go pics:

Show Spoiler


As you can see in the pic above, it's a picture that we call a tranceparancy, because you can see the chainlink, but the background (that is all checkered) is transparent. So when I use this on an object in Blender, blender will show the Chain Link, but you'll also see through the holes.

Now look at the next pic, it's from when I was first building my Age Campbravo:

Show Spoiler


While in Blender, I created a plane mesh, turned it on it's side. Gave it a new material, then went to Textures and loaded this image. I then told it to UseAlpha (remember, transparancies are called Alpha channels), and then I used the UV Map editor to make it look right, and map the coordinates for my image. Tah-Dah! You have a see through chainlink fence!
Note: if that's all you do, when you walk around the other side, poof, it seems to dissappear! You have to make another plane on the other side, facing the other way and do the same thing to make it look right.

Okay, got a better handle on Tranceparancies now?
"I'm still trying to find the plKey for Crud!"
Image
Blender Age Creation Tutorials
3DS Max Age Creation Tutorials
User avatar
andylegate
 
Posts: 2348
Joined: Mon Oct 01, 2007 7:47 am

Re: Lighting tutuorials

Postby Justintime9 » Sat Jan 26, 2008 2:31 pm

Sort of... so do I just get a pic, cut out the parts I want to see through, and then go to "Alpha channel" on one of the drop downs in photoshop? if so, what do I do to just make a transparent texture? I mean... not so that there's some see through parts, and others are not, but so that you can actually see through the texture itself.
User avatar
Justintime9
 
Posts: 1188
Joined: Sat Sep 29, 2007 5:37 am

Re: Lighting tutuorials

Postby andylegate » Sat Jan 26, 2008 3:15 pm

You'll definately need a program like Adobe Photoshop, or Gimp (the free open source version of Photoshop) to make stuff like this. It'll give you a lot more control over things.

I wish it were as easy as just click a button and everything is done, but alas it's not quite that simple. Still, you are on the right track.

If you're using a program like Gimp or Photo shop, you can add a background layer quite easy. Simply open up your Layers menu. It should list the layers you have, and normally it with most pics it will show them all merged to one layer called "Background"

Double click on the name "Background" and change it to something else, like Books, or whatever.

Next, in your picture menu, click on the menu item called Layers. You should have a selection called Tranceparancy. When you select it, you should see more stuff to select. What you want is "Alpha to selection" this will put in a tranceparent back ground in your picture, even though you can't see it yet, or in the layers.

Now, using one of your selection tool, select parts that you want to cut out of the picture. Once you get part of it selecte, go up and click on Edit, and select "Clear"
What should of happened, is the part you selected should disappear, and behind it you'll see that nice grey checkered background! Tah-Dah! Now go and keep cliping away all the stuff you don't want that way, and then export or save the picture as a PNG file.

The other way to do it is to again, rename the current layer to something other than "Background"
Then go up to the Layer menu and select New Layer.
The box that pops up will ask you to give it a name. Call it Background.
Next, in the same box, it should ask you what the fill type is. One of your selections should be Tranceparancy. Select that one, and click on Okay.
Now you should see 2 layers, your original picture, and the checkered one. select your picture, and again, start selecting stuff and clearing it. Again, you should see the checkered stuff when ever you clear a selection.
Once you're done, again, export or save the file as a png.

That's really all there is to it.
"I'm still trying to find the plKey for Crud!"
Image
Blender Age Creation Tutorials
3DS Max Age Creation Tutorials
User avatar
andylegate
 
Posts: 2348
Joined: Mon Oct 01, 2007 7:47 am

Re: Lighting tutuorials

Postby Justintime9 » Sat Jan 26, 2008 4:11 pm

Ah, ok, i get it :D that still doesn't explain how to make windows and stuff tho... even if I had a window texture, I can't just cut stuff out of it... it would look like something painted to look like glass with a bunch of holes in it :P how do I make the whole picture transparent, not just cut holes in it? O, and I do have photoshop
User avatar
Justintime9
 
Posts: 1188
Joined: Sat Sep 29, 2007 5:37 am

Re: Lighting tutuorials

Postby andylegate » Sat Jan 26, 2008 5:00 pm

Welll think about it.

What is a window? What defines a window?

In most buildings a window is simply an opening in the wall. What defines it is the wood trim around it, and the sash, the pieces that hold the glass in.

But the glass itself.....go look at a window. How do you know it's there with your eyes?

One this is your own reflection......and things in the room reflecting on it, faintly.

Well, unfortunately, we don't have the ability to make a reflection of the avatar.....that would be cool, but that's not possible right now.
You CAN make make reflections of what is in the room.....it's called making an Enviormental Map, and is something that I won't go into here has there are several tutorials both in Blender and Alcugs on it. It can be quite........difficult.......

What else makes the glass seen? Light reflecting on it? How about dirt in the corners......frost around the sides......finger print smudes.......

All of those you can make, using photo shop. For instance, frost around the glass plane.......

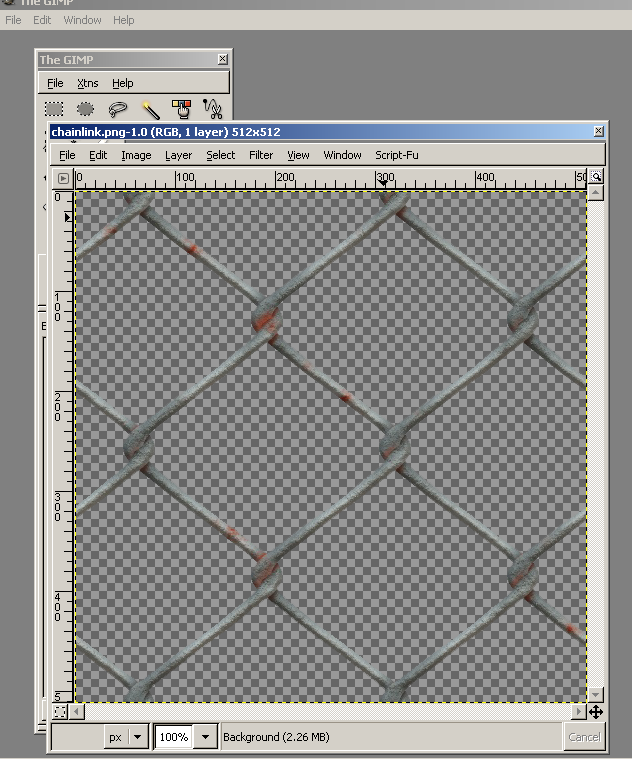
Go to Photoshop. Create a New pic. Make it 512 x 512 lets say. For the Background......tell it you want it to be transparent.

Now, what you should see is a 512 x 512 checkered square on your screen.

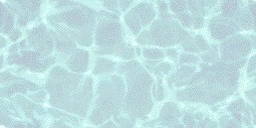
Now break out that Air Brush tool........define your color for it, you know, something like dirty white......

Now, you can also define how big the area is that is sprays, how much it sprays, how opeque it is (see through). Once you think you've got it set right, start spraying all along the edges of your pic and cornners.........

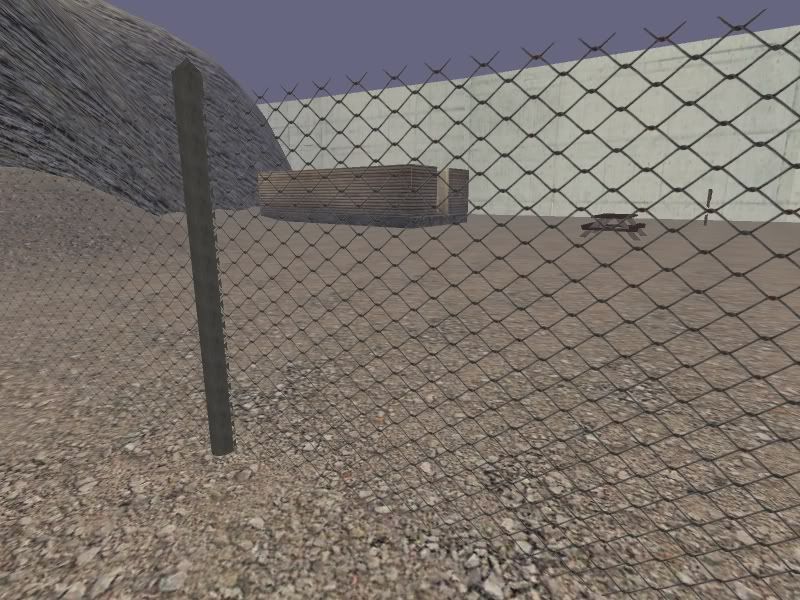
Once you're done, there you go! A glass pane that has frost around it! If you save it as a png file, and then use it in Blender, what you'll see is a glass window, that looks like it has frost all around the edges......but you can see through the middle of it.

It's all about illusion Justin. What we do here is give the illusion that something is real. More often that not, things look better in Uru when they are not......perfect. Sometimes slightly blurred, sometimes slightly dark, or light.......
The key is this:

Once you're done making something, export your Age and link in. Look at it. Does it look real to you? Make sure you do this in 1st person mode. Do you get a sense of, it's really there?
Or does it look fake. Is it too sharp, too blurred, too something?

If it's the last, no problem, go back and try changing things. But don't give up. Remember, they guys at Cyan have YEARS under their belts at making magic like this.

But that's the other thing. Think about what you're doing. How does it really look? Do you have something like that you can go look at? Can you find a picture of it somewhere to look at it?

Then think: What can I do to make it look real, or at least make it look like it belongs there?

:)
"I'm still trying to find the plKey for Crud!"
Image
Blender Age Creation Tutorials
3DS Max Age Creation Tutorials
User avatar
andylegate
 
Posts: 2348
Joined: Mon Oct 01, 2007 7:47 am

Re: Lighting tutuorials

Postby Justintime9 » Sat Jan 26, 2008 5:31 pm

Ah! thx :D what about water though? I have a really good water texture, but I just want to be faintly transparent, so that you can see the avi's legs underwater, to make the water more realistic. what would I do to accomplish that?
User avatar
Justintime9
 
Posts: 1188
Joined: Sat Sep 29, 2007 5:37 am

Re: Lighting tutuorials

Postby andylegate » Sat Jan 26, 2008 6:36 pm

Ah! Now that, you are sort of adjusting the see-thru property.......

But there a many ways to make a good water texture. Mostly it depends on what you're trying to do.

Here is one I did for my swimming pool:

Show Spoiler


If you open my image up in Photoshop, you see the checkered background, but notice how it's not all that clear.

Here is how you do that:

Make your picture of water, using Tranceparancy for the background. Pick a good color for you airbrush and adjust the size, etc, to how you want. Then try lightly spraying areas on the picture.
What you are shooting for is the odd looking reflective waves we see in pools of water......
Okay, once you're done, open up another new pic with a tranceparent background. Now go back to your other pic that you just airsprayed. Go up to Edit and select Copy.
Now go back to your new pic with the tranceparent background.
Click on Edit again, and pick Paste Into
This will past your pic as a new layer. If you look at your layer menu, you'll see it list the tranceparance as the background, and it also lists your spraypainted pic.
Now, click on the spraypainted pic layer to highlight it in the layer menu.
Look up towards the top of the menu. You should see a slider that says "Opacity"
Adjust the slider while watching the image. See? You can adjust how "See-Thru" your spray painted layer is!

Once you get it how you want it, save the whole thing as a png file.

Now when you apply it in Blender, not only will it be tranceparent, but will have a little bit of opacity to it too.

This is just one way to create water. For other ways, take a look at the Alcugs tutorials.
"I'm still trying to find the plKey for Crud!"
Image
Blender Age Creation Tutorials
3DS Max Age Creation Tutorials
User avatar
andylegate
 
Posts: 2348
Joined: Mon Oct 01, 2007 7:47 am

PreviousNext

Return to Building

Who is online

Users browsing this forum: No registered users and 21 guests