Okay, already showed Bob this via PM's over at the GoMa forum, but thought I would share here too:
N. Sigismund got it pretty much right, I'm here to add some pics and more detail about this.
In order for Vertex Painting with Color to work you have to give it it's own UV Channel. You can use Vertex Painting for Alpha without this and export fine. But if you want to paint color, you'll get a plConvert error when you try to export.
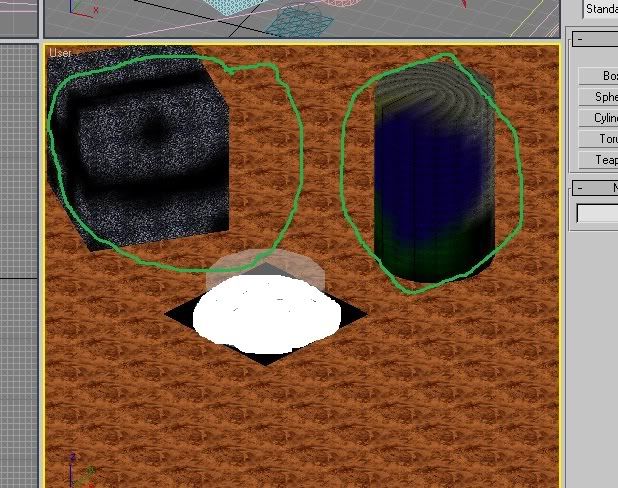
So here we have a pic of the 3D scene from Bob's test Age here. You can see that he made a cylinder, textured it, and UV mapped it. He then went to the Modifiers Tab and assigned Vertex Paint to it, and you can see the colors he painted (the Cube with the black on it, is Vertex Painting for Alpha, so ignore it):
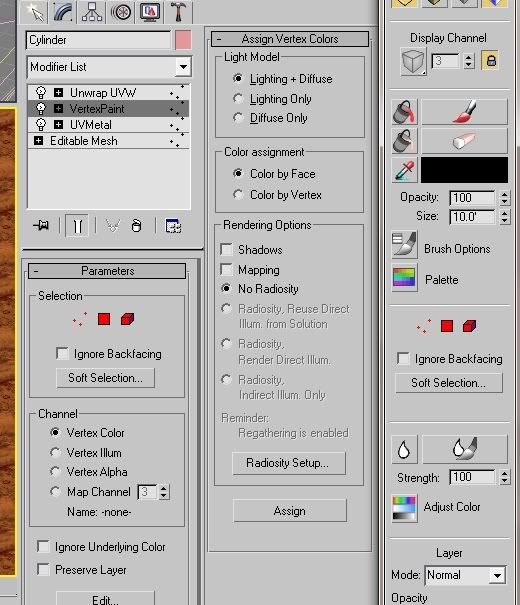
You can see in the pic below how the Vertex Painting for Color is set up in the Modifiers Tab:
Next thing you want to do is, go BACK to your first UV Unwrap modifier, and click on Edit. Select all your verticies in the edit box and click on COPY. This is because you'll want the 2nd UV layer to use the same unwrapping that you used the first time.
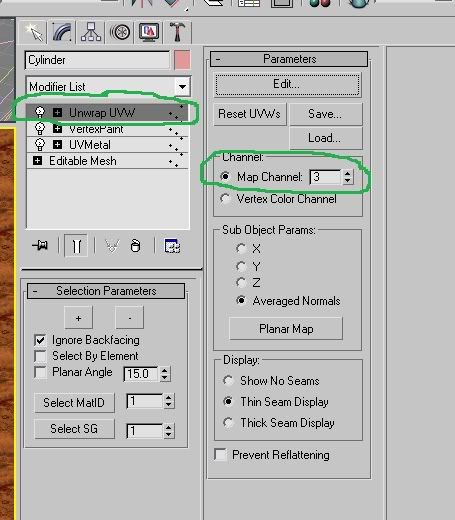
Now add your 2nd UV Unwrap modifier. You'll want to assign it a different channel that "1" ("1" is the UV channel for the texture). In my pic below Bob has his 2nd UV Channel set to 3.
Click on the Edit button and select all the verticies in the edit box and click on PASTE this time. Now your 2nd UV channel is mapped just like the first one for your texture.
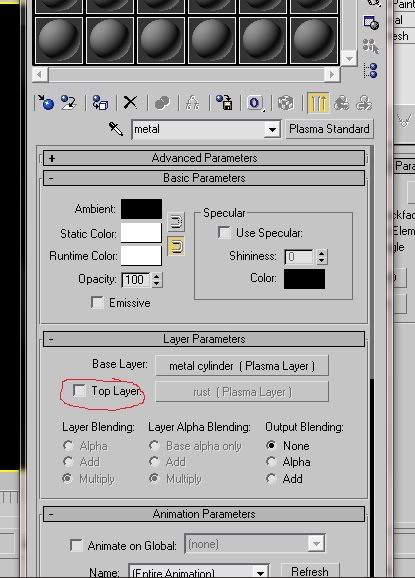
Now call up the Materials Editor and select the Material you assigned your object. In Bob's case, he has a Plasma Standard Material assigned to the Cylinder. With Plasma Standard you can assign 2 Map layers for textures. Bob has only one texture, but we'll need to use the 2nd (also known as "Top" layer) for the Vertex Painting (If you have many textures assigned to an object and are using Multi/Sub, don't worry, because you'll still be using Plasma Standard for each sub material, and can still do this).
Select the "Top" texture by putting a check mark in it. Set you Blending to Multiply, Multiply, and None (you can play around with these if you'd like to see if you get better results). Then click on the button for the "Top" map layer:

Now you should be in the Top Layer Map. Look at my pic below. You'll want to remove the check mark where it says "Use Texture" (you don't have to pick a texture to use), and change the UV map channel to the same number you gave your 2nd UV Map channel. I gave mine the number 3 remember? So I changed it here to the number 3.

Now that you've done that, go back to the Material itself. Now REMOVE the check mark for the Top layer! If you don't, you'll get a error on export saying that you're missing a texture, and we don't want that!
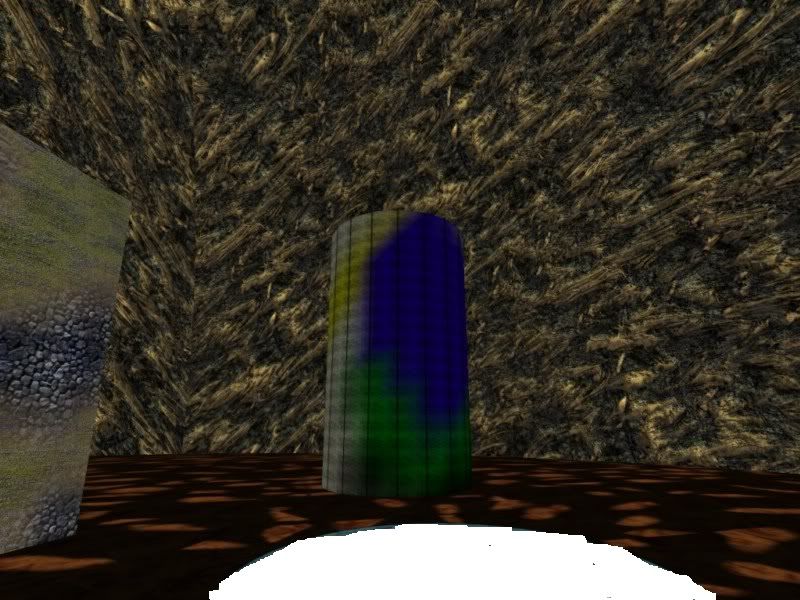
That's it! Export your Age, Drizzle it, link in and check it out. From this KI shot, you can see that Bob's cylinder has the Vertex Painting on it (you can also see the Vertex Alpha on the cube).